Here’s our installation notes to help you get the job done
Essential Pre-installation Dos:
Diagnose the clutch malfunction before prior to replacement.
Use this checklist:

Basically, ensure that the above mentioned parts function well and do not have problems. Malfunctions, including wear and tear and breakage, must be properly addressed (corrected, replaced) before installing a new clutch.
Installation notes:
IMPORTANT REMINDER:
- Use only the specified clutch. Malfunctions may result from using clutches that are not correct for the application. When in doubt: check either our online catalogue or contact our customer service for further clarification and guidance.
- Flywheel must be replaced or machined.
-
1. When fitting the clutch, mind the shaft splines, clutch disk, and bell housing.
Clean the gearbox main drive shaft splines and ensure that the clutch disc slides freely on the shaft. LIGHTLY grease the shaft splines with high temperature grease. Using too much grease may contaminate the clutch plate/disc. Clean the bell housing: degrease, dust off and remove worn clutch fibres. 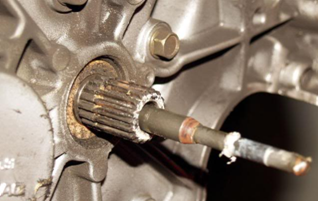
-
2. Ensure that bearing carrier functions properly:
Lightly lubricate the outside diameter of the tube to allow the bearing carrier to smoothly slide. Check the bearing on clutch release fork after installing the bearing on it and make sure it is placed securely. Move the fork forwards and backwards if nothing falls, then we are good to refit the gearbox. 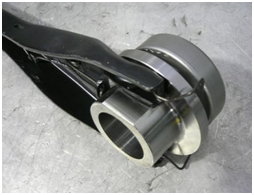
-
3. Ensure correct pressure plate-clutch disc alignment.
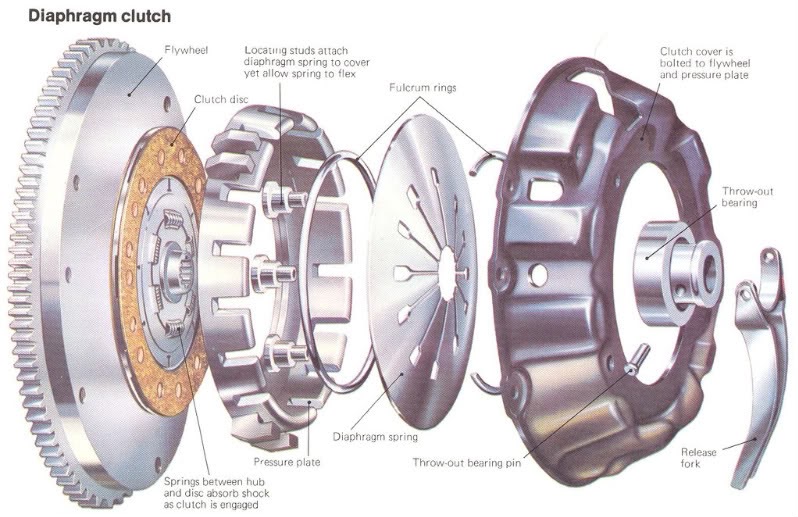
Place the clutch cover pressure plate assembly over the clutch disc. Ensure that the disc is precisely centered to the pressure plate for proper alignment. Apply pressure. Tighten/torque bolts in a diagonal pattern. DO NOT use air tools to install a clutch cover assembly. Incorrect torquing down of the bolts may result in an uneven pattern and may cause the lever strut to dislodge from the pressure plate casting. Thus, bolts should be torqued according to manufacturer’s specification.
Attach the pressure plate securely to the flywheel. Make sure that the diaphragm tips (in the case of a lever type cover assembly, the release lever tips) are in a parallel or slightly upward position. -
4. Finishing up
Refit the gearbox. BE CAUTIOUS: (a) not to bend the clutch disc; (b) not to hang the gearbox off the clutch disc; (c) use any force to align gearbox shaft.
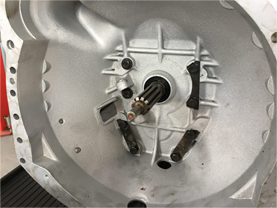
Tighten bell housing bolts and ensure that bell housing dowels are in correct position. Clean, clean, clean: Ensure there is no dirt or foreign material between the mating surfaces of the engine and the bell housing. Do any clutch adjustments to vehicle manufacturer’s specifications and don’t forget to reset the clutch master cylinder push rod to ensure comfortable pedal release position. KEEP IN MIND THAT: (a) clutch taking up as close as possible to the floor prevents clutch shudder; (b) the installation of the new clutch changed the position of the diaphragm tip
-
5. Finishing up
Check the clutch cable if you are unable to obtain disengagement when a new clutch is fitted. Replace the cable and examine where the disengagement issue comes from. If it is a hydraulic clutch start by checking the clutch master cylinder and the clutch slave cylinder. Make sure that there is no air in the system and that nothing blocking the compensating port. This is essential to obtain maximum travel for disengagement. Road test vehicle.